Exploring the transition of an existing 3D scene into an interactive VR application using Unity's XR Interaction Toolkit. By setting up the XR origin and implementing interactors and interactables, the aim is to allow users to engage with and navigate through the XR environment, offering a preview of the immersive and interactive experiences the application aims to provide
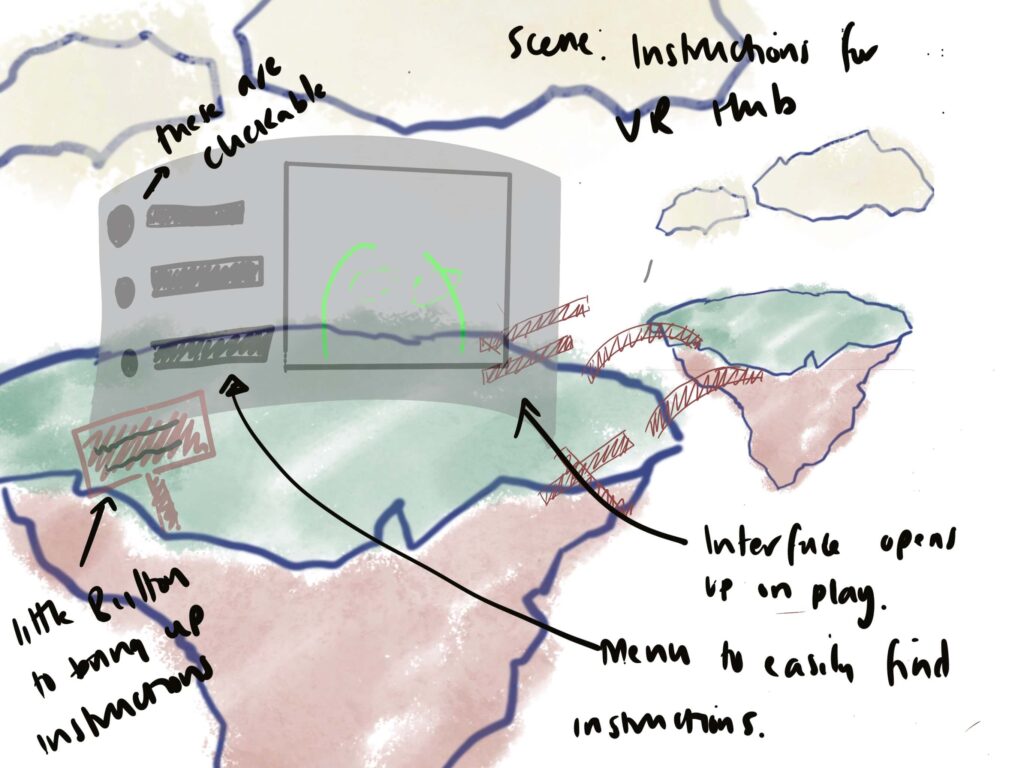
After completing last week’s tasks exploring the ProBuilder within Unity and importing assets from the Unity Asset Store and Sketchfab, this week’s first task was to sketch and imagine the first scene [building upon the storyboard created last week] and incorporating project changes created by working in unity.
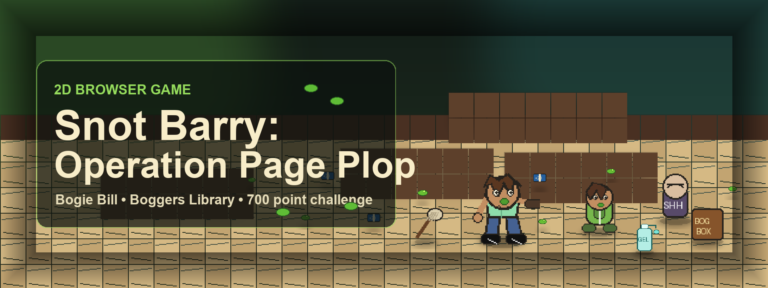
Users will now begin on a central island, greeted with a tutorial on controls and a bridge-building task. They will adventure from one island to the next, each offering unique encounters, such as the next scene of the butterfly experience. Inspired by extensibility principles, the modular framework remains adaptable and ready for further innovation.
Users will now begin on a central island, greeted with a tutorial on controls and a bridge-building task. This leads to the butterfly experience on the next island. Modular tasks can be added around the main central island.
XR Set up
XR Plugin Management & XR Interaction Toolkit
Following this week’s lesson materials, I installed and configured the XR Plugin Management system. This foundational step is essential for integrating VR functionalities into Unity projects, allowing developers to create immersive and interactive 3D environments tailored to various VR hardware.
I installed the Oculus XR Plugin for Oculus hardware and the OpenXR Plugin to cater to a broader range of VR devices. A noteworthy step during the OpenXR Plugin installation involved accepting a prompt to restart the Unity editor, a necessary action to apply the changes effectively.
Next I installed the XR Interaction Toolkit, this simplifies the creation of interactive VR experiences. The toolkit introduces a framework for managing interactions within the VR space, employing concepts of interactors (e.g., the user’s hands) and interactables (e.g., objects within the VR environment) to craft a seamless interactive experience. I then installed the starter assets and loaded the demo scene.
Distinguishing Between Traditional 3D and VR Scenes
A key insight gained during this process was the distinction between traditional 3D scenes and VR scenes in Unity. Unlike traditional 3D, where the camera movement is either script-controlled or follows a character, VR introduces the concept of the headset acting as the camera. This paradigm shift necessitates a unique approach to scene setup, highlighting the immersive nature of VR, where the user’s physical movements directly influence their perspective within the game.
Implementing XR Origin for VR Movement
XR Origin Setup: A crucial component of VR development, the XR Origin, was implemented to facilitate head-tracked movement, replacing the default camera setup. This setup aligns the virtual environment with the user’s physical movements, enhancing the immersion and realism of the VR experience.
Configuring Input Actions
Understanding and configuring input actions were essential steps in bridging the gap between real-world controller inputs and in-game actions. The Interaction Kit input offers predefined mapping that simplifies this process, allowing for intuitive interaction within the VR space.
Testing the Demo Scene with a Quest Pro Headset
Before setting up my virtual scene for the VR Hub, I wanted to test the DemoScene and play around with the interaction examples. Following a tutorial on YouTube, I built and ran the demo scene from my MacBook Pro to the Quest Pro Headset. In doing so, I came across the problem below.
After fiddling with the build settings and having no success, I realised I did not need to add the 'XR Orgin' component to the scene as there was already one! 🤣
For future reference, I screen-recorded myself interacting with the DemoScene and the videos were added to my Project Miro Board. I also made additional notes regarding the interactions I plan to implement for the first Scene of the ‘VR Hub’ [taken from lesson materials].
In VR or 3D interactive environments, there are different types of movements that can be applied to Grab Interactable Objects once they are grabbed, such as Kinematic Movements, Instantaneous Movement, and Velocity Tracked Movement. Kinematic movements offer precise control, instantaneous movements provide snap-to-hand convenience, and velocity-tracked movements deliver a more natural and physically interactive experience. These modes of interaction make the user experience more natural and intuitive, reducing the need for complex controllers or gestures for basic interactions. By implementing these modes, developers can greatly enhance the realism and feel of the interaction, and offer a more engaging and accessible immersive experience.
The recorded videos provided invaluable insights into the interactions within the scene, shedding light on user feedback during various interactions with the elements
Building My VR Scene
XR Simulator and Teleportation Integration
After experimenting with the sample assets, the foundation was laid to start constructing my own VR scene. In the process, I came across the XR simulator, which I imported from the sample assets included in the XR Interaction Kit. This tool proved invaluable as it enabled me to test changes and interactions within the game simulator before committing to building and running the project from Macbook Pro to Quest [saving lots of time!].
After setting up the XR scene, the next step was configuring the teleportation functionality. The goal is to enable free movement across the floating island model, allowing me to gauge its size and strategically place assets. Moreover, I aim to allow users to explore the island at their leisure, enhancing their immersive experience. Once assets are positioned, teleportation anchors and areas will be added, guiding users through the experience while allowing them to roam. Additionally, I intend to include hidden surprises, catering to more advanced users who enjoy uncovering Easter eggs within the VR environment.
The Teleportation Area Component was added to the plane of the floating island GameObject [rather than adding an additional teleportation area].
Left Video: Using XR Simulator in Game view - Right Video: Testing in Quest Pro Headset
Interactors and Interactables
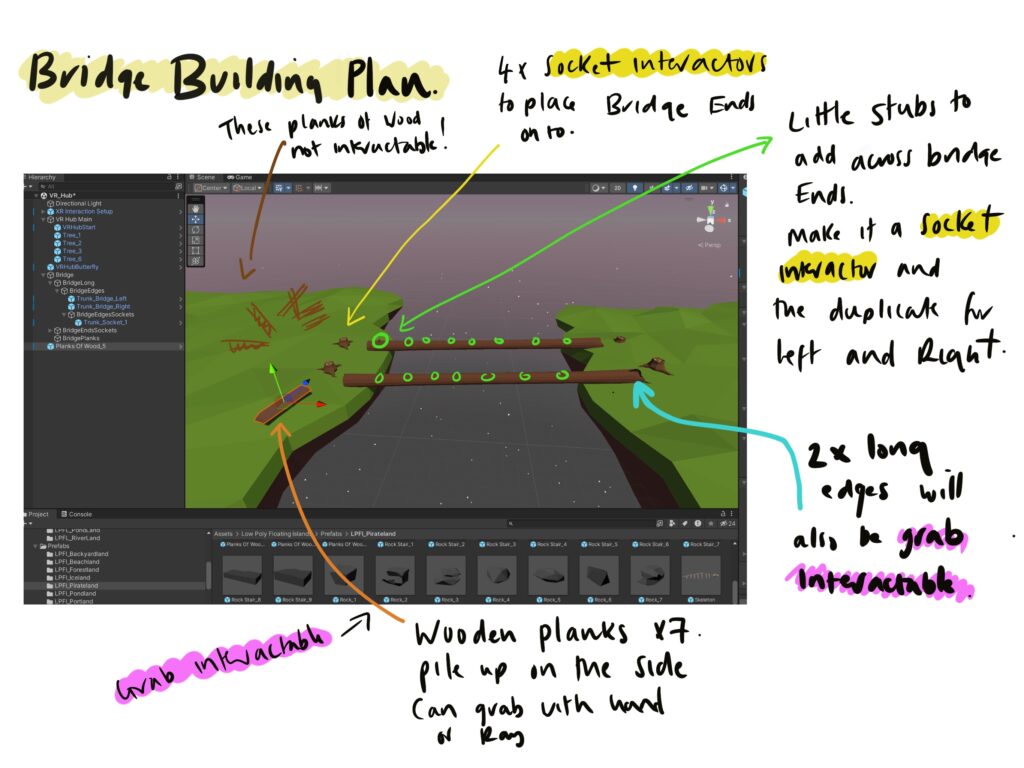
Following the introduction to interactors and interactables, the next step was to visualise how these elements could facilitate the construction of a bridge within the virtual environment. To begin, I sourced a selection of prefabs [from the asset packs previously downloaded] suited to fit the bridge design and placed them within the scene.
Among these assets were long planks of wood intended to serve as the main beams spanning the island and four stumps designed to act as sockets for the beams. To enable users to interact with the bridge components, I created cylindrical sockets to which the individual wood planks could be attached. However, upon testing the scene within the VR headset, the assets were disproportionately large.
In response, I decided to create a scaled-down version of the bridge within the demo scene and conduct easier-to-manage testing primarily to address the issue of oversized assets encountered during initial testing. This approach allowed for more precise adjustments and facilitated a clearer understanding of how users interact with the bridge components.
During testing, I observed that the wood planks exhibited realistic bounce, which could enhance the immersion for users seeking a lifelike experience. However, I also recognise that this realistic physics behaviour might pose a challenge for users still familiarising themselves with the controls. While it could be good practice for mastering the interaction mechanics, I plan to explore adjustments to the physics settings to balance realism and user-friendliness. This approach ensures that the bridge components behave realistically and intuitively, providing an engaging yet accessible VR experience for all users.
Additionally, I encountered difficulties with the functionality of the sockets, preventing the seamless attachment of bridge components. Further investigation was needed to refine this interaction aspect and ensure that items remain stable and aligned as intended once locked in place. These insights gathered during testing will inform iterative improvements to the bridge construction mechanics, contributing to a more polished and user-friendly VR experience.
Socket Configuration Experimentation
Initially, I experimented with small capsules intended to serve as socket interactors. However, I shifted my focus towards connecting two game objects directly to understand it better. Following a detailed YouTube tutorial (Berg, 2022), I learned how to utilise empty game objects to establish attached transform points while configuring the box collider as a trigger. This setup effectively connected the two objects at specified junction points (the pink capsule was there as a reference to where I added the attach point). With this foundational knowledge, I can experiment with various bridge configurations. As I refine these techniques, my next goal is to apply them to the pre-made prefabs from the acquired asset packs.
After I have finished building the bridge, I must figure out how to add UI for the welcome tutorial and bridge-building instructions. I still need to add the scene assets, but I will do that last. That will be the easiest part of creating the VR hub.
Although I have not yet mastered socket interactors, experimenting with these functions has been fun!
Bridge Building Continued [Updated Tue 16th April 2024]
Creating Plank Prefabs
I started with wooden plank models and converted them into prefabs. Allowing for consistent and reusable game elements.
Setting Up Sockets
I placed empty GameObjects along the long plank to serve as sockets. These sockets were meant to “snap” the planks into place when the player positioned them correctly. Initially, I added XR Socket Interactor components to these GameObjects but forgot to add colliders, which are essential for detecting the planks’ presence.
First Test: Detecting Sockets
To address the issue, I added Box Colliders to each socket GameObject. This adjustment made the sockets detectable but still not functional for snapping.
Second Test: Adjusting Collider Size and Position
I then experimented with the size and position of the colliders. By making the colliders larger and slightly lowering them on the long plank, I created a more forgiving interaction zone. This allowed the plank prefabs to snap into place effectively when brought close to the sockets.
Third Test: Duplicating the adjusted socket point along the plank
After successfully configuring a single socket point to connect properly with the wooden plank end, I duplicated and positioned multiple sockets at points along the plank, ensuring each could interact seamlessly with the corresponding components.
Initially, the project was conceived with a plan to develop two sides of the bridge, potentially adding complexity and depth to the puzzle. However, the current success has paved the way for what I now consider “Bridge 2.0” in the VR Hubb scene. I will use this bridge version if I can’t figure out how to connect two points!